
When thinking about the ideal home movie experience, elements such as the size and resolution of the image, the number, and positioning of speakers and the seating layout often take priority. However, lighting control is also a big part of the picture.
Balancing the output of your projector with screen size, controlling background lighting and even attending to little touches like step lighting all combine to affect the final outcome. Read this article to make sure you have thought of everything before inviting friends and family to that long-anticipated first movie night.
The Right Projector: A Balancing Act
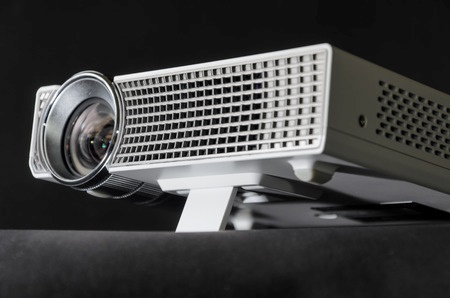
Assuming you are going for the authentic projector and screen set up, rather than a TV, choosing the right projector is one of the most important decisions you will make.
Rather than splashing out on the most expensive projector available, it is better to use a scientific approach based on the amount of light projected and the ambient light levels of the room.
Visible light output (luminous flux) is measured in lumens but this light has to be distributed over the area of an image. This is why a large image is experienced as less bright than a smaller one even though the number of lumens from the projector is the same.
The way in which light radiation is dispersed over distance can be seen in the following diagram with the character ‘A’ representing a portion of the different-sized images created by placing the screen at various distances (d) from the projector (s).
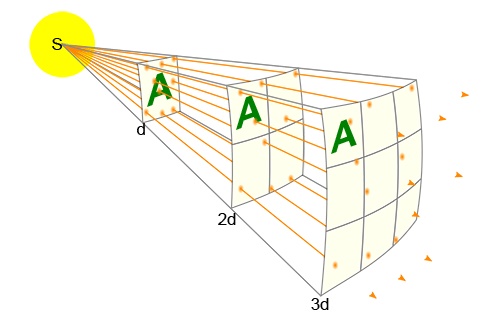
Most commercial projectors have an output in the 2,000 to 4,000 lumens range, so this can be used as an example when comparing various sized images.
Using the 4:3 aspect range, an image of 6′ x 8′ gives us an area of 48′ square (the image at distance ‘2d’ in the diagram). A 2,000 lumens projector would, therefore, produce around 42 lumens per square foot.
A smaller image of 3′ x 4′ (the image at distance ‘d’) gives us an area of 12′ square – a quarter smaller. Therefore, the same projector would produce approximately 167 lumens and the smaller image would appear brighter.
However, if a 4,000 lumens projector is used to create the original 6′ x 8′ image, you would only get around 83 lumens per square foot.
In this case, it would be more economical to reduce the image size than to splash out on the more powerful projector. This may or may not be practical depending on the layout of your room and the effect you are looking to create.
This example illustrates how a little bit of technical knowledge can help you to balance your home theater design with your budget. However, the puzzle is incomplete because we haven’t yet looked at the effect of ambient light on the brightness of your movie images.
Ambient Light and Contrast
Ambient light can also be measured in lumens but, unlike your projector output, it contributes to both light and dark levels. By dividing the two values you arrive at a number representing a contrast.
A small contrast value (e.g. 20 and below) indicates a ‘washed out’ image of grays and whites whereas a large one (e.g. 200 and above) indicates a crisp image with clear differences between dark and light areas.
We can extend the earlier examples by looking at the effect of using a projector in both a typical movie theater and a normal room.

Movie theaters tightly control ambient light, producing around 0.1 lumens per square foot on average. A 2,000 lumens projector producing a 6′ x 8′ image in these conditions would provide a high contrast of 42.1/0.1 = 421.
However, that same projector producing the same size image in a room of average brightness (around 45 lumens per square foot) would provide a very low contrast of 87/45 = 2
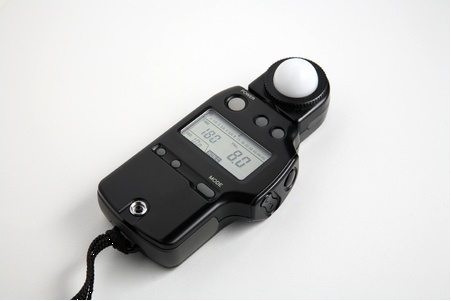
Most homeowners will be able to reduce ambient light to the 1-2 lumens range and a luxmeter can be used to measure this value accurately. With the set up detailed above, 1 lumen of background light would produce a good contrast of around 43.
Measuring and Controlling Light Levels
Luminous flux can be measured using specialized luxmeters. Although a variety of free and ‘paid for’ luxmeter apps have been developed for mobile devices, tests have so far revealed that they are unreliable and shouldn’t be used as a cheap substitute for professional hardware.
Real luxmeters are fitted with sensors which have been adjusted to mimic the brightness sensitivity curve of the human eye and to take account of the angle of incidence of the light as it reaches the sensor.
Once you have a value for your ambient light you can work on reducing it to the required value to provide adequate contrast for the projector/image size set up you have planned.
Start by making the room as dark as possible by ordinary means (drawing curtains, turning off all unnecessary lights, etc.).
To eliminate light from windows you have several options. Black-out curtains are ideal as they also help create a movie theater feel. If you don’t want to replace your existing curtains, consider lining them with blackout fabric. You might find that some inset blinds or drapery panels work better in your home. Rails and drapery panels can be set up across doorways too if needed.
At the same time, work on removing or reducing sources of reflected light. Mirrors and glass doors are common culprits but anything reflective (metal trims, china ornaments, poster glass, etc.) can conspire to break the movie illusion. These should be removed, repositioned and covered as necessary.
Finally, LED indicators and LCD displays on electronic devices, including your home movie kit (speaker systems, TVs, etc.), can be surprisingly intrusive. Investigate settings to see if you can turn off or minimize any of these lights. If you have the budget or craftsmanship, you might be able to find ways to cover or retract equipment during the movie itself.
One of the advantages of measuring ambient light, rather than using your judgment, is that you may find that the ambient light levels of your room are fine as they are or require minimal expense to fix.
The Final Touches
The previous sections covered the fundamentals of lighting management in home movie theater design: a bright projector and tight control of ambient lighting. Now we get to the fun part.
There are many ways to get creative and replicate that real movie theater experience. Rather than running around switching off lights, consider investing in a dimmer system to slowly bring down the lighting levels and create that pre-movie excitement. If you really want to create an impression, think about integrating lighting, curtains, screen lowering and equipment retraction into one automated system controlled by a universal remote – or phone app.
Another neat touch, especially if you are designing from scratch, is to install LED step lights into the flooring. These can be switched on during an interval to allow people to safely find their way to the bathroom or popcorn machine whilst keeping the light levels low.