With online streaming and video gaming fast becoming popular, a home theater can help you enjoy not just 2D, but 3D content as well. It’s no surprise that the global home theater market is expected to reach $13,050.2 million by 2025, growing at a CAGR of 8.3% during the forecast period (2019-2025). The North American market dominated the global home theater market in 2018, and it is expected to grow at a CAGR of 7.9% during the same forecast period.
One of the most critical elements that add value to your home theater experience is the wiring. Usually hidden within your walls or under the carpet, wiring acts like the nervous system that connects all your home theater equipment. Using the right type of wire can help you get the most out of each element of your home theater system.
However, home theater wiring is not as easy as it sounds. Depending on the size and location of your home theater, you may need a lot of wiring to connect audio, video, and other elements in the room. This guide will help you understand everything there is to know about home theater wiring.
Let’s start with the basics.
Know Your Home Theater Cables
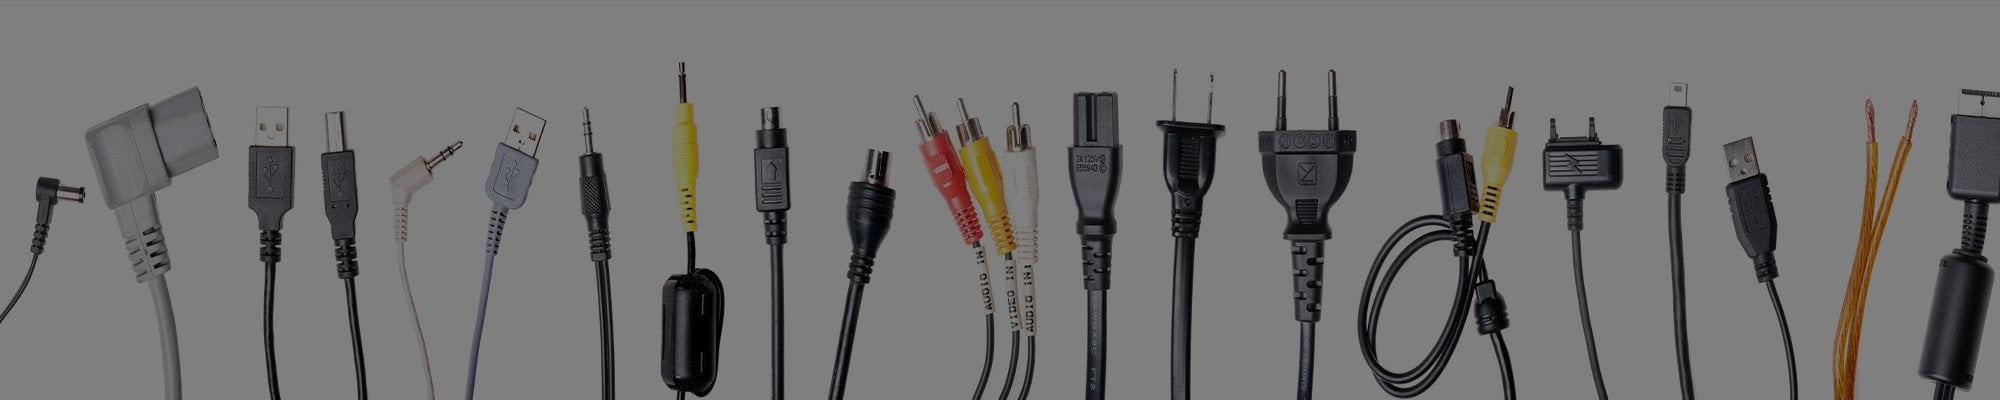
The most important part of your home theater wiring is the cables. The right type of cables can help you assemble all the equipment quickly and efficiently. Here are a few common types of cables you may need when setting up your home theater wiring.
HDMI Cable

HDMI stands for High-Definition Multimedia Interface. It is one of the most commonly used cables for TVs, projectors, computers, and laptops. This cable allows you to transfer both audio and video from a high definition input device to an output device.
You can enjoy a 4K video and 32 audio channels with a single HDMI cable, which isn’t very costly. It can also dynamically synchronize audio and video streams. You can also get HDMI cables with advanced features such as ethernet connection, 3D display, and CEC (Consumer Electronics Control) extensions.
DVI Cable
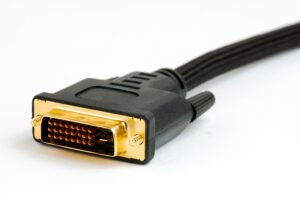
Digital Video Interface or DVI cables can provide you with a high-quality picture, particularly for projectors. You can also use them if you are going to use your TV as a laptop or computer screen.
The biggest advantage of a DVI cable is that it allows you to send videos with extremely high resolution. Depending on the number and arrangement of pins, you can find the following three types of DVI cables.
- DVI-D: Sends digital signals
- DVI-A: Sends analog signals
- DVI-I: Sends both signals
You can check these specifications in the user manual or product information, and buy a suitable cable.
S Video Cable
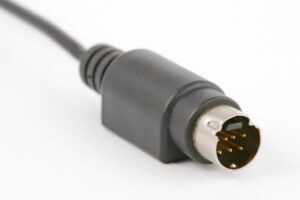
With S Video cables, you can transmit standard-definition video from DVD players and VCRs to your TV. In this cable, the video gets transmitted through two synchronized signal-and-ground pairs called Y and C.
The Y stands for the luma signal, comprising the black-and-white part of the video, while the C is the chroma signal that transmits the color part of the video. As it transmits two separate signals, the video quality is much better than composite cables.
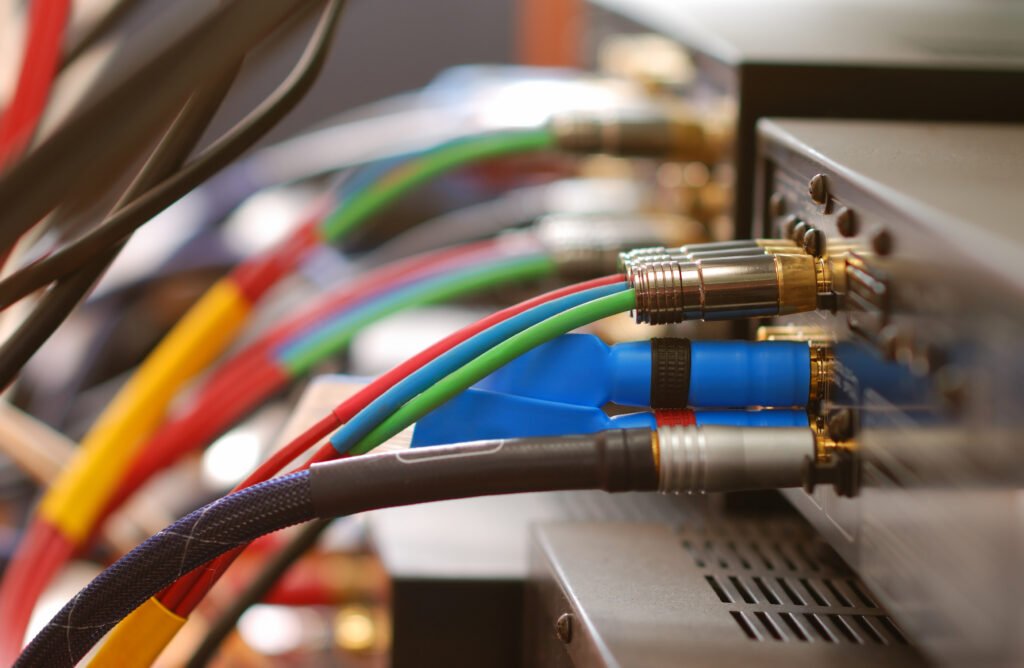
Component Video Cable
Component video cables can help you deliver clear, rich, and crisp videos. This cable delivers high-quality analog video signals between input and output devices, such as from blue rays and DVD players to TVs.
At each end of the component video cable, you will see three plugs: red, green, and blue. Make sure to connect them as per the color-coding. It is one of the most commonly used cables in home theater settings, especially if you don’t have HDMI or DVI cable options.
VGA Connector Cable
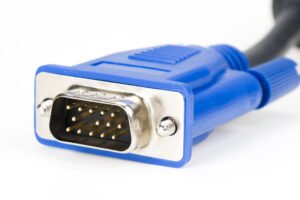
This cable is primarily used to connect computers with video output equipment. Usually, a Video Graphics Array or VGA cable has a 15-pin D-sub connector (male part) that fits into the 15-pin D-sub port (female part) on your device. You can connect this cable only one way round.
This cable can receive an analog RGB signal from the input device and supports standard as well as high-definition signals. A VGA cable will not transmit audio signals. However, it is the best cable for transmitting video from your computer or laptop to your home theater TV or projector if you can’t use HDMI or DVI. You can also use a VGA to HDMI adapter to convert VGA into HDMI video.
Composite Video Cables
Composite video is a dying technology. That’s why you will not see composite cables being used in most home theater setups. Given a choice, it is always better to use component video cables instead of composite as they support better resolution. The only time you may need to use these cables is when transmitting video from older input devices such as VCRs.
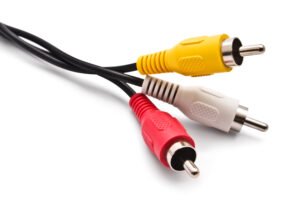
Stereo RCA Cable
RCA stands for the Radio Corporation of America, which first used these cables. RCA audio cables have two RCA connectors, usually white and red or black. Red or black is for right channel and white is for left channel.
You can use these cables to transmit analog multichannel audio to your AV devices. Although HDMI is the preferred cable for audio and video transmission, stereo RCA cables help you connect a variety of AV devices, such as camcorders, stereos, and speakers to your TV or projector.
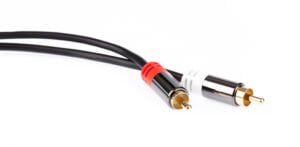
Multichannel RCA Cable
If you can’t use HDMI or optical cables, multichannel RCA cables are the best way to power 5.1 or 7.1 surround sound in your home theater. Make sure to connect the right ends between the output and input devices. Remember, however, multichannel RCA cables will not transmit digital audio. Also, not all DVD and Blue Ray devices will support multichannel RCA connections.
Coaxial Cable
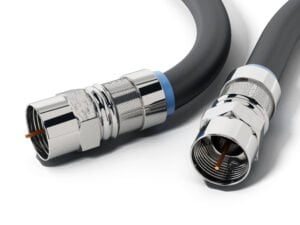
You can use coaxial cables for transmitting both audio and video signals. They are a better fit for shorter distances compared to optical fiber cables because coaxial cables are less expensive. They are also durable and easy to install. If you have a cable connection or a satellite TV, you may already know this cable.
These cables can transmit high-quality AV signals to your home theater TV and projector. Coaxial audio cables don’t support 4K video and high-end audio signals like Dolby Digital Plus, Dolby Atmos, DTS-HD Master Audio, and Dolby TrueHD. However, if you don’t have an HDMI option, coaxial cables are your best bet for sending AV signals to your output devices.
Optical Audio Cables
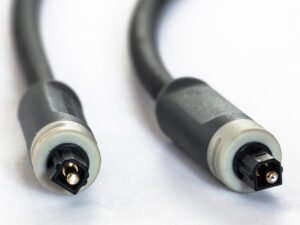
Optical audio cables use laser light instead of electrical impulses to transmit digital audio signals between devices. As these cables were introduced by Toshiba in 1983, they are also called TOSlink cables. These cables can support up to 5.1 surround sound transmissions for home theaters.
Compared to RCA cables, the signal transmission is clearer, crisper, and faster. However, they may not support high-resolution audio formats on Blue Ray discs. They also work best for short distances, usually not more than 10 meters. But if you don’t have an HDMI option, an optical cable is your best alternative.
Speaker Wire
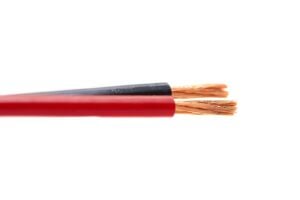
Most speaker systems don’t come with wires. So, you will need to buy them separately. You can find speaker wires with or without connectors.
It is better to buy speaker wires with connectors as connecting wires directly to the speakers are difficult. If you already have wires without connectors, buy banana connectors, also known as banana plugs, to make connections easily.
Speaker wires come in different gauges. Usually, thick wires (12 or 14 gauge) are better for longer runs while thin wires (16 or 18 gauge) are more suitable for short distances. Thin wires are also more suitable for high-power and low-impedance speaker systems.
SCART Cables
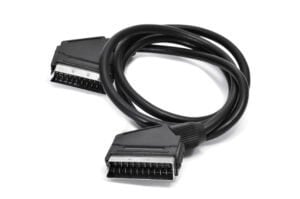
SCART cables are also a dying technology. Like composite video cables, you will need to use them if you have old AV equipment like VCRs. While these cables can transmit analog AV signals, they don’t support digital AV signals or any other modern technologies.
Important Factors You Need to Know about Home Theater Cables
When buying the cables for your home theater wiring, you will need to take a few important factors into account. Not considering the following factors can result in a poor home theater experience. With the right type of cable, you can also enjoy the true benefits of your high-end home theater equipment.

Conducting Material
Choosing the right type of conducting material is really important as it directly affects picture and sound quality. While the cables made from gold-plated connectors are the best, they are also cost-prohibitive for home theater projects. Although they will improve the signal quality, the core will still be made of copper, which is not as good a conductor as gold is.
However, copper is the most economical and conductive option. Although copper will oxidize (turn green) over time, it will offer good value for money. Oxidization, if unchecked, will reduce the conductivity substantially. Also, cables with copper core will cost you more than aluminum wires as copper is expensive.
You also have the option of using Copper-Clad Aluminum (CCA) wires. Although these wires have slightly high resistance, they are relatively less expensive and also lighter. That’s why they are commonly used for speakers.
Resistance
Resistance needs to be as low as possible as higher resistance translates into poor signal quality. Gold offers the least resistance. However, as it is expensive, you can’t find wires made of pure gold. Silver also has lower resistance, but it is expensive as well. That’s why copper and copper-clad aluminum are the best options you have for home theater wires.
Length and Thickness (Gauge)
As resistance is directly proportional to the length, you need to keep the length of your cables as short as possible. Make sure to take the length into account when planning your layout.
The thickness (measured in gauge), on the other hand, is inversely proportional to the resistance. So, thicker wires will have lower resistance. You can use thin wires for short distances. However, as the distance increases, it is better to use thick wires to improve signal quality.
As per the American Wire Gauge number, a lower gauge number indicates higher thickness. There are four different gauge sizes including 12, 14, 16, and 18. While 12 and 14-gauge wires are more suited for long runs, 16 and 18 are best for short distances. Universally, a 16-gauge cable is the best choice for an 8-ohm speaker, provided it runs shorter than 50 ft.
Cost
Cost is also an important consideration when buying cables for your home theater. Usually, people tend to buy the most expensive cables available in the market. However, expensive doesn’t always translate into better AV quality, especially over short distances.
If the distance between equipment is short, any standard-quality cable will provide you with the desired level of performance. However, considering the three factors mentioned before this one, if the length increases, investing in an expensive cable can provide benefits in the long run.
High-quality cables do come with better insulation. It not only protects your home theater from accidents, like a short circuit, but also provides protection against electrical interference. This, in turn, improves the picture and sound quality.
Advanced Features
Some modern cables, particularly HDMI cables, come with a variety of advanced features. Along with 4K picture quality, these cables may also support ethernet connection and 3D gaming, among other things.
If you are going to use your home theater setup to play video games and watch movies over the internet instead of cable TV, you should invest in an HDMI cable with these advanced features. Usually, buying the latest cable is better as technology keeps evolving. However, do think of your budget and entertainment needs before making the decision.
How to Put the Wiring Together
Your home theater wiring specifications will change depending on the size of your home theater, your equipment, seating area, and budget. That’s why, in this guide, we are going to discuss a general plan.
Here’s how you can do it.

Create a Wiring Map
You don’t need a blueprint like your electric contractor would have. However, you do need to create a general home theater wiring map that tells you which connection goes where. It will also help you understand the size and type of wires you need for your setup.
Usually, a typical home theater will have the following equipment:
- TV or Projector with a screen (video output)
- AV Receiver (central unit)
- Cable or Satellite TV or Blue Ray (AV input devices)
- Sound System (audio output)
As mentioned before, this layout may change depending on what devices you have. For example, if you are using a 5.1 surround sound system instead of 7.1, your speaker layout will change and so will your wiring. Similarly, if you have a DVD player, you will need RCA cables, while more modern AV receivers and TVs have HDMI connectors.
Understand Your Wiring Needs First
Before you drive to the nearest hardware and electronics store, make sure you know the type and quantity of cables you need. First, find out the type of connections all your devices can support. For example, if you need to convert VGA into HDMI, you will need a special adapter or you may need a special cable such as a DVI-HDMI cable that lets you convert DVI output into HDMI input.
Also, measure the length of the cable you need to connect the equipment, especially your speakers. The best way is to arrange your speakers and use a string to measure the length of wire you will need for connecting them. You should add a few extra centimeters for each connection so that it isn’t too tight.
Make the Connections in Stages
When you are wiring your home theater, it is best to make the connections in stages. If you start doing it all at once, it will be difficult for you to keep the cables apart. You may also end up connecting negative leads to positive ports and positive leads to negative ports. It will affect the quality of sound.
When doing it in stages, keep the following in mind:
- First, connect the inputs from your Blue Rays or Cable TV to the AV receiver.
- Connect the video (AV if you are using HDMI) output cable from your AV receiver to your TV or projector.
- Connect your speakers to your AV receiver. Make sure to connect each speaker in phase. In other words, all the male connectors should fit into suitable female connectors. It will create an additive sound system that will provide you with the ultimate hearing experience.
- Use wires required for the specific stage by checking the connections first. Most home theater equipment will display the type of required cable or connector. So, it’s really a matter of buying the specific cable and making the connections.
Check All the Connections
When making connections make sure to identify the positives and negatives of the wires and the devices. Your speaker system is like an electric circuit. So, it will work only if everything is connected correctly. Once you have set up the connections, make sure to check if everything is working fine.
If the connections are correct, you will hear excellent sound. If it isn’t, the sound quality will be extremely poor or there will not be any sound at all. When making HDMI or VGA connections, make sure to insert the connectors tightly into the devices. Loose connectors will impede AV signal quality.
How to Hide Home Theater Wiring
Hiding home theater wiring is one of the most crucial aspects of your setup. It is always a good idea to hide the cables as wires lying around openly are a major tripping hazard. Plus, they also ruin your home theater aesthetics. There are many easy ways to hide cables.
Cable Concealers and Duct Raceways
Cable concealers or duct raceways is one of the best ways to hide your home theater wiring. It is popularly known as “trunking,” where cables are concealed in a plastic tube or duct. Although it isn’t as aesthetically pleasing as wiring behind the walls, it is an incredibly cheap and easy-to-install option for hiding cables.
These plastic ducts are simple wall-mount wire concealers and corner raceways. The latter are triangle-shaped ducts that help you conceal and run speaker wires through wall or ceiling corners.
Most ducts come with pre-applied adhesive back that will help you mount the duct directly on the wall. However, you may have to use additional screws to provide enough support to the wires. As these duct raceways come with a Snap-On cover, you can easily check and maintain the wires whenever required.
Wall-Mounted Flat Speaker Wires
Another cheaper and easy-to-use alternative is wall-mounted flat speaker wires. These wires are thin and flat, and have pre-adhesive back. All you need to do is peel the tape and stick the wire to the desired surface. You can run these wires along the walls or under your carpet or on your ceiling.
You can also paint these wires on one side, helping them blend into your wall color easily. You may need to do a little sanding, painting, and use joint compound to conceal the wire perfectly. However, it is easier and cheaper than in-wall wiring.
The only downside is that flat wires can be more fragile than regular speaker wires. So, you have to be very careful when installing and concealing them.
Under-Carpet Wiring
Under carpet wiring is a cost-effective and efficient wire concealing hack. You can tuck the wire under the carpet and the bottom of your baseboards, running it along the wall of your home theater room. You will need to tuck the wire in slowly as you move along the length of the wall.
It’s a plus if you can find a small pre-existing gap in the baseboards or the floor. You can easily conceal the wire in this gap. If you have a hardwood floor, you can use wood-colored wire raceways to conceal the wires. This method will not affect your décor at all.
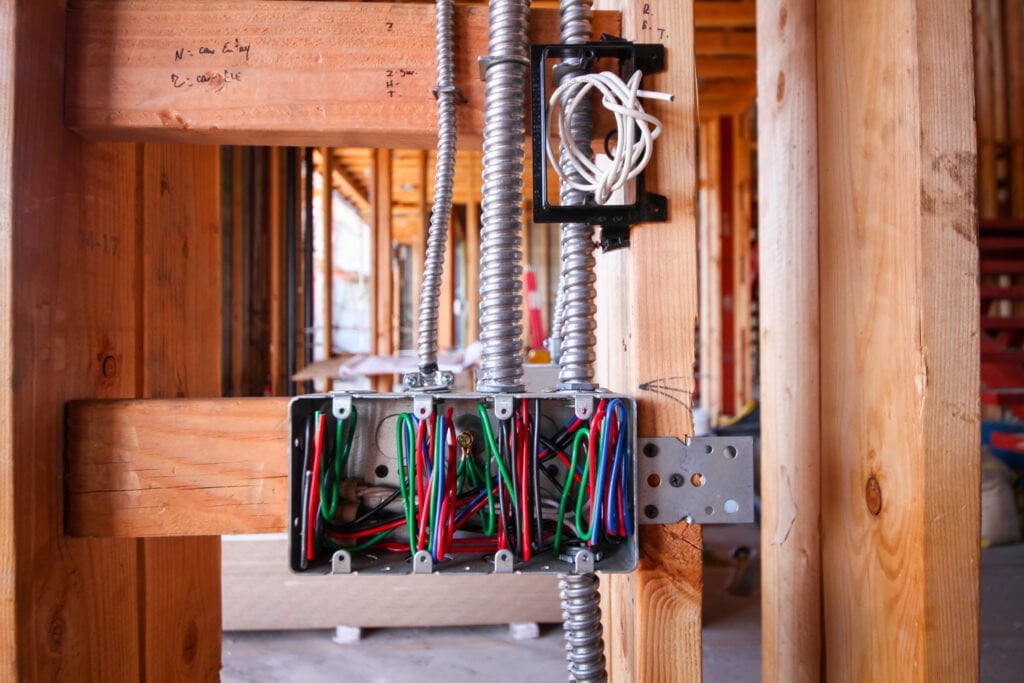
In-Wall Wiring
Although in-wall wiring is the best way to hide your home theater wires, it is also an expensive and demanding process. It is most suitable if you are building a dedicated home theater room from scratch, as you can easily install wiring before putting up the drywall. If not, you will need to tear down the existing drywall, which may not be economical or practical in most cases.
You will need advanced DIY skills as well, including drilling, cutting, and drywall repair. If not, it is better to call professionals to ensure safe and efficient wiring. If you are going ahead with DIY, make sure to plan everything first. Check if you have a crawlspace or existing gaps that you can use to run the wires wherever possible.
Mark the points where you want to drill the holes or cut the drywall. You will also need to buy suitable brackets for speakers, wall-mounted volume control systems, nail plates, and junction boxes. Be sure to get all your supplies, tools, and equipment before starting your work.
Go Wireless
The best way to avoid the hassle of running and hiding a network of speaker wires is to go wireless. As there are no cables to manage, you can avoid a ton of legwork. However, wireless speaker systems are relatively expensive. Furthermore, your AV receiver or TV will need to be compatible with wireless speaker systems.
Wiring Tips for Improving Performance
When setting up your home theater wiring, you need to take a few extra precautions to improve its efficiency. Here’s what you need to remember.
Ventilation Is Crucial
Whether it is your TV or your projector, all home theater equipment will produce heat when they are in use. Although you are using air conditioning, you have to make sure that each piece of equipment has enough ventilation.
Make sure to keep plenty of free space around the equipment. Avoid crowding them together in one place or keeping them in a confined or closed space. It will allow the heat to dissipate into the room.
Too much heat can interfere with the proper functioning of the equipment and circuits, resulting in irreparable damage. Depending on the equipment, you may also need a dedicated mechanical ventilation system for the devices.
Stay Away from Power Cables
Power cables produce a strong electromagnetic field that can interfere with the audio and video signals passing through your home theater cables. This, in turn, can lead to distorted audio and video. The best way to avoid this problem is to place your home theater cables and power cables as away from each other as possible.
Running these wires across is a lot better than running them alongside each other over a long distance. If you do so, however, make sure your home theater cables have thicker insulation to reduce the effect of the electromagnetic field.
Use AV Adapters Wisely
In most home theater setups, you may need to convert one form of audio or video signal into another. You need to use an adapter or a special converter cable to change the AV signal.
For example, you can use a VGA to HDMI adapter to convert analog VGA output from your laptop or computer to your high-definition TV. When choosing an adapter or a converter, make sure to check the specifications to ensure it’s the right fit.
However, when it comes to a home theater setup, you do need to plan for the future as new technology is continuously entering the market. So, sometimes, instead of using an adapter or converter, it is better to invest in the latest equipment. So, do your research, and plan accordingly.
Your Safety Comes First
While you focus on the sound and picture quality, you can’t forget about your safety. When it comes to home theater wiring, keep the following safety tips in mind:
- Make sure to wear the required safety gear when wiring your home theater. You should also know how to use each piece of equipment to avoid any accidents.
- If attempting DIY, check the local electrical and building codes to find out what you can and can’t do. If the law requires you to get professional help, call an electrician immediately.
- Plan everything well in advance. Don’t ignore any safety instructions or skimp on equipment quality.
- Do your research. Thorough research will not only improve the quality of your work but also ensure your safety.
- Always use a good-quality surge protector to protect your home theater equipment from unexpected power spikes. As a surge protector will wear out over time, get one with a replacement indicator. The indicator will help you replace the surge protector before it’s too late.
- Label your cables to understand which one goes where. The complex nature of home theater wiring means one can easily get lost in different types of cables and connectors. Labeling will also help you locate the exact wire if you run into any issues in the future or when carrying out regular maintenance.
- The most obvious safety tip is to keep your kids and pets away from your home theater room when you are working. You will be using various tools that could easily compromise their safety.
- Finally, whenever you feel like you aren’t up for a task, call for professional help. You may need to spend a few hundred dollars now, but it will save you from a lot of expensive re-work or repair in the future.
Parting Words
Home theater wiring is one of the most crucial aspects of creating a truly immersive entertainment and gaming experience. It is, however, also the most challenging step in building a home theater. From selecting the right type of cables to running the wires and connecting them safely, each stage of the home theater wiring process needs to be planned and executed carefully. Hopefully, this detailed guide will help you understand the various steps involved in wiring your home theater on your own. Have you ever tried wiring your home theater yourself? Feel free to share your experience in the comments section.
Home Theater Seating
- Navy And Black Leather Recliner
- Octane Flex Hr Review
- Movie Theater Home Entertainment Seating
- Big And Tall Living Room Chairs 400Lbs
- Angled 4 Seat Theater Seating
- Half Round Theater Seating
- Single Theater Power Recliner
- Lumbar Support Recliners
- 2 Person Recliner With Console
- Leather Media Room Chairs
- A Recliner With A Heater In It
Decor & Accessories
Top Pages
- Red And Black Theater Seating
- Movie Theater Furniture For Homes
- High Weight Capacity Theater Seats
- Leather Recliners With Lights Underneath
- Memory Foam Recliner Xxl
- Curved 4 Seat Home Theater Seating
- Diamond Tufting Leather Theater Seating
- Individual Theater Seating
- Power Recliner Leather Seating
- Oversized Double Recliner
- What Size Are Curved Home Theater Seats